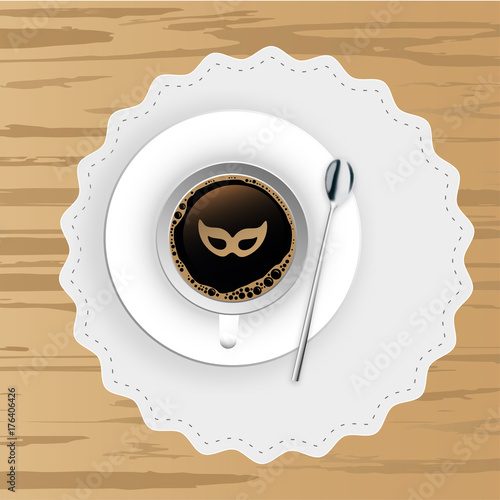
Kaffee auf Holztisch - Maske
- Pricing
- Information
- Description
To modify this file you will need vector editing software such as Adobe Illustrator, or CorelDRAW. Other licenses are downloaded as JPEG files.
To modify this file you will need vector editing software such as Adobe Illustrator, or CorelDRAW. Other licenses are downloaded as JPEG files.
Login or Register! To organize the photos in galleries you must first register or login. Registration is Free!
To modify this file you will need vector editing software such as Adobe Illustrator, or CorelDRAW. Other licenses are downloaded as JPEG files.
To modify this file you will need vector editing software such as Adobe Illustrator, or CorelDRAW. Other licenses are downloaded as JPEG files.
Login or Register! To organize the photos in galleries you must first register or login. Registration is Free!
Our Monthly Packs allow you to download hi-res photos and vector files whenever you want within a month, with just one simple price for all files.
If you don't use all your downloads, they simply roll over to the next month for as long as your pack is active or renewed.
Of course, Monthly Packs can be cancelled at any time up to 72 hours prior to renewal, so if you only need stock visuals for one month it's still the perfect choice!
Login or Register! To organize the photos in galleries you must first register or login. Registration is Free!
The vector illustration "Kaffee auf Holztisch - Maske" from Daniel Berkmann is available on Fotolia under a royalty-free license from 2 credits (Credit from $0.74).
Available in AI/EPS and JPEG formats, this vector file may be downloaded for all kinds of professional uses. The V and XV files are delivered in AI/EPS. To modify this file, vector editing software such as Adobe Illustrator, Freehand, or CorelDRAW is required. JPEG files are available in different resolutions (up to 3,873 x 3,873 pixels in 300 DPI).
The author of this picture, Daniel Berkmann also has 32 images in the same series.
To download this vector file, you can buy Fotolia credits, a monthly pack or purchase a subscription plan and benefit from the amazing price of $0.19 per image.
Same Series

Polygon Button mit Schatten - Maske


Hand tippt auf Smartphone mit App - Maske

Maske - Maskiert - Silber Münze mit Reflektion

Masken - Silberne Buttons
Standard license
With the Standard License, images can be used for any illustrative purpose in any type of media.
Extended license
The Extended License gives you all the rights granted by the Standard License, but also the ability to print our creative files more than 500,000 times and allows you to use them on your own products. An Extended License lets you create derivative products or services intended for resale or distribution.
Find the perfect asset for your next creative project
Get 10 free Adobe Stock images.
Fotolia is now Adobe Stock. You'll get access to all the essential Fotolia content and so much more.
Diverse, stunning content
Adobe Stock offers an incredible range of exceptional images, videos, and templates plus 3D, editorial, and Premium assets to make your work stand out.
Tight integration with your favorite creative cloud apps
Preview watermarked images inside your designs to make sure they look just right. Then license and manage them directly within Photoshop CC, Illustrator CC, InDesign CC, and other Adobe desktop apps for a seamless workflow.
Services
Need help?
General TermsPrivacy policy © Fotolia 2017  AdChoices
Coffee Mud Mask

Mud mask were a huge part of my life growing, my mom, grandma and most of the women in my family loved them. I was never allowed to wear them as much as my mom , but when I became a teen I can remember sneaking to my friend’s house and applying loads of the stuff on my face. I never knew why it was so important to put mud on your face, but the tingle was always the best part to me. Buying tubes of mud can get pretty expensive. Let’s not forget you can go months without using it, and it usually dries up in the bottle by the time you would like to use it again. 


Mud mask have lots of skin loving benefits; I love the fact that mud mask tighten the skin, helps with inflammation and if your pores drives you crazy like mine. Mud mask will definitely become your face new best friend. The key to a good mask is the clay. There are all sorts of clays on the market, but if you’re new to making mud mask I suggest you start with bentonite clay it’s cheap, easy to find and works wonders. If you would like to know what type of bentonite clay I use I talk a lot about it HERE. I love a coffee mud mask because you get all the benefits of the clay and coffee grounds revitalize the skin and also get rid of dead skin. Just think of a coffee mud mask as a low cost facial scrub with all the benefits…

4 tbsps. bentonite clay
2 tbsps. coffee grounds
2- 5 tbsps. apple cider vinegar (can be substituted for water)
Recipe Directions: In a small bowl add clay, coffee grounds and mix until incorporated, add 1-2 tbsps. apple cider vinegar to mixture and mix, if the mixture is to thick and more vinegar until it thins out. Smear over face in a circular motion and let it set for 5-10 minutes or until the mask hardens. Rinse mud from face and add a light layer of lotion to face, to prevent drying.
This mud mask sounds awesome! I can just imagine how great this mask smells with the ground coffee:)
Lol depending on the coffee they can smell lovely and some can smell rancid

Haha, yeah that is what I thought too.. It is a lovely mask and works wonders but smells like very bad coffee breath!! :p
Can you use unbrewed coffee grounds, or should it specifically be used grounds? I like the idea of full-strength caffeine working its magic, but don’t want hyper skin… lol
Lol you can use either one! I have made this mask with french vanilla unbrewed coffee grounds, and all I smelled was vanilla while the mask was on my face!!
Dawn Mello says
This is awesome. Thanks for the idea. Recycling is a great idea. lol
ohhh, thank You Shundara for this epic recipe
and while reading it i was thinking cocoa powder
going to experiment With that
have a great weekend <3
Thanks so much, I hope you enjoy it and let me know how it turns out!
What an amazing DIY mud mask recipe…you are a genius, Shundara! I can imagine the lovely coffee smell….and I want to put this on my face first thing in the morning…haha!
A definite must try! I love doing my own homemade beauty products, it’s more fresh and safe that way. Thanks for sharing
Thanks! I hope you enjoy the mud mask
Hello! I am wondering if the vinegar has a strong smell.
Depending on how long it’s been in your cabinet it can produce a strong smell. If your now a fan of apple cider vinegar you can substitute it for water..
I am very interested in trying your concoction! Just wondering how you store it – does it need to be refrigerated or can it be stored at room temp?
Also, how long can you store it?
Once you have applied the mask to your face you may not have any left, but if you do have you can store it air tight container at room temperature for a few days and then put it in the fridge. Make sure the air does not hit it or it will dry out the clay.
What is bentonite clay and where can I get some?
I would like to know where to find clay.
Can you use red moroccan clay powder instead of the bentonite clay?
I don’t see why not let me know how it turns out
Love the idea of making your own mud mask, can’t wait to give it a try
Tiffany Scott says
Just an FYI with using bentonite clay, I’m not sure about other clays but I do know that with bentonite clay don’t use ANY metal in the making process, the metal will cancel out the awesome detoxing properties of the clay.
I have never ever had a problem with using clay and metals.. I have never heard of it canceling out the properties and I always use a metal spoon. My skin is nice and soft.
Bentonite clay must never touch metal! Use a wooden spoon, not metal!
Thank you for giving your opinion on using a wooden spoon with bentonite clay because you believe that it cancels out the detoxifying properties. However as the writer of savvy naturalista I cannot go along with this! I have not seen any scientific proof or any study showing that you cannot use metal (I use stainless steel by the way) with bentonite clay. I have also read all the blogs that tell you not to do this and they don’t have any backed sources. Furthermore they don’t tell you what detoxifying properties it cancels out and why. If you’re going to make a broad claim as a blogger please explain to the readers what, how and why. I consider myself somewhat a pioneer of natural living (been doing it for 6 years) and have a balance on this blog. That’s why it’s called the Savvy Naturalista. I make living simple naturally very easy for all. If you choose to use wooden spoon go ahead. However I will not tell my readers to do that if they choose not to. I also know that most facilities (not all) who package bentonite clay are probably using metal to do it in; so they probably are canceling out all the properties of the clay before it gets to you. I will stand by this belief until I find a study or source backed by a study that makes sense.
Thanks so much for your Comment
Darlene Jade Alpapara says
I really thought it has something with a mud or a mud ingredient.
Clay is actually considered mud, so you were right
as in your orange sugar scrub you have used orange extract is that food grade because i have pure lemon and orange extract at home can i use them in my scrubs
This one looks delicious what’s more if you put this on your face. We all know that coffee has been a good source of antioxidants which minimize or stops the premature signs of aging. It rejuvenates the skin making it look fresh and radiant. It is also easy to do, anyone can make this. Thanks for sharing.
Trackbacks
[…] You can’t go wrong with a mud mask to rejuvenate your skin, and this DIY version of a coffee mud mask is my […]
[…] Coffee Mud Mask – Coffee Mud Mask that only requires three ingredients to keep your skin nice and tight this […]
[…] ingredients needed to make a revitalizing face mask are already available in your own pantry! This coffee mud mask recipe from SavyNaturalista.com requires only three ingredients: coffee grounds, apple cider […]
[…] Coffee Mud Mask by Savy Naturalista […]
[…] This intense mask is great for skin that is developing fine lines, and the mud will also help reduce any inflammation that may be occurring on the skin. Not to mention the apple cider vinegar which will tone your skin. Get the full recipe over at the Savvy Naturalista. […]
[…] The avocado mask will complement dry skin. In addition to the olive oil, the avocado moisturizes the skin. The lemon, however, works to clear the redness of the skin. Another mask you can use for dry skin is the coffee mask. […]
One more step
Please complete the security check to access deavita.com
Why do I have to complete a CAPTCHA?
Completing the CAPTCHA proves you are a human and gives you temporary access to the web property.
What can I do to prevent this in the future?
If you are on a personal connection, like at home, you can run an anti-virus scan on your device to make sure it is not infected with malware.
If you are at an office or shared network, you can ask the network administrator to run a scan across the network looking for misconfigured or infected devices.
Another way to prevent getting this page in the future is to use Privacy Pass. Check out the browser extension in the Firefox Add-ons Store.
Cloudflare Ray ID: 3c7f567f1a289077 • Your IP : 185.87.51.142 • Performance & security by Cloudflare
How to Make Cowboy Coffee
Cowboy coffee is a simple but delicious method of brewing coffee that doesn’t require any special equipment. In fact, all you need to make cowboy coffee is water, coffee, a kettle, and a heat source. While cowboy coffee is traditionally made over a campfire, you can also make it over any type of heat source. Because you don’t filter out the grounds when you make cowboy coffee, the key to making it is settling the grounds and pouring the coffee slowly.
Ingredients Edit
Steps Edit
Part One of Three:
Brewing the Coffee Edit
Part Two of Three:
Settling the Grounds Edit
Part Three of Three:
Serving and Drinking Cowboy Coffee Edit
Community Q&A
Things You’ll Need Edit
Related wikiHows Edit
Use a French Press or Cafetiere

Make Instant Coffee

Make a Good Pot of Coffee

Make Better Office Coffee

Make Coffee Using a Percolating Coffee Pot over a Campfire
Clean a Coffee Maker

Use a Milk Frother
Make Black Coffee

Make Coffee without a Coffee Maker
Made Recently
Upload a picture for other readers to see.
About This Article
A wikiHow Staff Editor reviewed this article to make sure it's clear and accurate.
30+ Quilts To Make
Here’s is a large collection of free quilt projects that I’ve organized from my bookmarks and previous Tipnut features…many are simple to make and perfect for beginners. Plenty of inspiration in this list!

Simple: Learn how to machine quilt with this simple project.


Raw Edge Layer Cake: The seams are clipped to give some great ‘cuddle-up’ texture.


Snuggly Bricks: Quick and easy made with fat quarters.


Boxed In: This is definitely one that can be put together in a weekend, or even less, if you are ambitious!


Pieced Scrap Border: The pieced block is no more than a square center that has been given a pieced border.


Crazy Nine Patch Lattice: Crazy nine-patch blocks, with another tutorial for making a nine-patch lattice.


T-Shirt: You’ll need around 20 t-shirts to make this quilt.

Modern Square Garden: This shows you how to make the top, finished sized is 38 1/2″ x 51 1/2″.


Vintage Sheet: A simple project perfect for beginners using blocks of vintage sheets (you can use any fabric you like).


Cathedral Window Tutorial: Measurements and instructions for making a cathedral window block…includes lots of resources.


1-2-3 Easy: This utilizes the “pillow-case” method of binding, so there are no bias strips to make.


Blue Jeans: This is the project you’ve been saving your old jeans for.


5×5: For babies but you can make it larger for an adult sized if you like, no problem!


His & Hers: Finished size is 99″ x 100″ and a fun variation of a coin quilt.


Self Binding: Teaches how to use a larger piece of fabric for the back and use the extra fabric to bind.


Raw Edge Jelly Roll: All the cutting is done for you with this easy-peasy project using 64 jelly roll strips and batting.


Sucky Puff (yo-yo): Finished size measure 42-1/2″ x 54″ or 28 rows of 21 yo-yos. Includes template for making the yo-yos (each is filled with a small pom pom) and then instructions for assembling.


Mc-Cheats-A-Lot: Assorted squares of fabric are sewn on top of a duvet, edges are unfinished (or do a zig-zag stitch around edges if you prefer).


Whale’s Tale: Queen size (85 1/2″ x 93″) and made with 36 tail blocks (5″ x 20″). Template included in pdf tutorial.


Here’s a vintage string quilt tutorial (First published on Tipnut September 2, 2009 and moved to this page for better organization)

*Click Picture For Larger File
- Use 10 inch squares (or smaller) from better parts of worn blankets or men’s flannel shirt tails, for block foundation Step 1. This also makes the lining. A grand opportunity to use up all those long slender scraps left in the scrap-bag.
- Pre-Shrink Materials That Are New by wetting and pressing.
- Sew strips to the foundation piece as shown Step (1) and (2) Making Block (1) with two sides loose.
- Step (3) Lay block (1) on top of block (2).
- Pin lining on block (1) back out of seams way and sew edge of two blocks together. Flatten seam and whip the lining on block (1) down flat over the seam. Either put together in strips or make a square and keep adding blocks. Finish edge with a binding.
- The whole trick is to keep the sewn edge of one block inside the loose edge of the other block when putting the blocks together. When set together the lining is finished too.
Source: Women’s Household Magazine (1960s)
Print 
Published: November 26, 2010
Updated: September 12, 2012
More Goodies To Check Out:
Purse Organizers To Make
How To Make Duvet Covers:
DIY Yoga Gear To Make:
What Readers Are Saying:
I can’t believe there are so many gorgeous free quilt patterns on the Internet! Thanks for the list Tipnut!
I am so happy to see quilt patterns on your site. Keep them coming.
Thank you for the quilt patterns and tutorials. I will visit many times.
Great post here, cant believe it…
Thank you so much for featuring my chevron rag quilt on your very cool site!
I have never made a quilt and I’d like to start but I don’t have any one around me that can show me how to do it. does any one have a suggestion on the most simple pattern to make. it has to be really simple. I have trouble concentrating some times, so if it’s to difficult I’ll give up
Welcome To Tipnut.com
1000s of Ideas & Projects
. all for you to enjoy.
Find the latest creative ideas from Tipnut herself plus freebies compiled from around the net.
Tip: Search online with the word "tipnut" to find the good stuff fast!
Best Coffee Machines
Reviews of the Best Coffee Makers and Machines

How to make good coffee with a percolator
Percolated coffee is some of the richest, best tasting and strongest coffee you will ever taste. Just like Gran made it in the old days, the smell of a brew percolating in the kitchen is hard to beat. Some people will only use a percolator, some have tried drip machines and gone back to using a percolator.

1. Fresh coffee in a clean pot with filtered, cool water.
These three in combination are so basic to any good brew that they hardly need elaboration here. Keep your pot clean of any coffee residue. Use freshly ground coffee. Use clean, filtered water. As the percolation process adds plenty of oxygen, you do not need to oxygenate the water, and so bottled water is fine to use.
2. Place sufficient quantity of coffee in the filter basket.

Add water to the pot before placing the stem and filter basket inside. The water level should not reach the filter basket.
If you have an electric model, then simply turn it on and wait for the magic to happen. If you have a stove top percolator, put it on a low to medium heat. As soon as the first burble hits the glass bubble, turn the heat down. You should aim to have no more than 1 “perc” every three to five seconds. Any more than this will boil the coffee, and result in a burnt flavour. You need to keep the water in the pot at about 95 deg Cel or 200 deg F, and allow the steam pressure to build up in the stem and bubble over gently. Keep this going for about four minutes, or one minute per cup of water.
5. Remove from the heat once done
When you have finished the brew, remove the pot from the heat. Open the pot and take out the filter basket and stem (do not scald yourself!). This is so that the steam does not condense inside the pot lid and continue dripping through the used coffee. If you have an electric model, resist the temptation to use the “keep warm” feature – it is far better to decant the coffee into a clean, pre-warmed thermo flask. The “keep warm” option on any coffee maker always has an effect on the flavour.
6. Enjoy a good, rich, strong brew!
Shelly Abdallahs süße Beauty Fashion und Lifestyle Welt
Shelly Abdallahs kleine süße Beauty Fashion Lifestyle Welt. Mit vielen leckeren Rezepten, Beauty Produkten, Fashion und natürlich erfahrt ihr auf meinem Blog auch eine menge über mich und mein Leben. Eine bunte Mischung aus allem.


Balea Soft & Clear Maske
14. August 2017


- Klärt und reinigt das Hautbild bei regelmäßiger Anwendung
- Beugt der Entstehung neuer Pickel und Hautunreinheiten vor
- Porentief gereinigte Haut

| AQUA | ALCOHOL DENAT. | POLYVINYL ALCOHOL | CAPRYLYL/CAPRYL GLUCOSIDE | SALICYLIC ACID | PANTHENOL | CHARCOAL POWDER | PARFUM | XANTHAN GUM | ZINC PCA | SODIUM HYDROXIDE | PANTOLACTONE | CITRIC ACID |


Nach dem entfernen der Maske, fühlt sich mein Gesicht weich, zart und gepflegt an. Die Pickel sind nach den ersten 2 Anwendungen noch vorhanden, sie fühlen sich wie soll ich sagen. Sie fallen nicht mehr wirklich auf. Die Haut sieht nach der Anwendung schöner, gepflegter und glatter aus.
Am Anfang der Maske verspürte ich ein leichtes brennen, es war nicht schmerzhaft halt nur leicht. Mein Gesicht hat die Maske gut vertragen, ich hatte trotz dem leichten brennen, kein Juckreiz, Rötungen, Allergie oder ähnliches.
Ein Wundermittel gegen Pickel ist das Produkt nicht, trotzdem ein wirklich gutes Produkt, wo ich mit zufrieden bin. Für meine Haut war es geeignet. Jeder Haut reagiert aber anderes auf Produkte. Ich kann es empfehlen und werde mir die Maske wieder kaufen.
verwenden oder empfehlen ??

Kommentare:

Die Maske hab ich auch schon länger zuhause, muss sie echt mal ausprobieren :D Toller Beitrag!


Du hast aber schöne große Augen! :) Ich bin ja ehrlich gesagt kein Fan solcher Masken, denn das Abziehen ist für meine sensible/empfindliche Haut einfach nichts. :) Da nutze ich doch lieber Masken, die ich abwaschen kann. :)
Die Masken zum abziehen verwende ich selten, da die meisten Masken zum abziehen schlecht abgehen :)
Die zum abwaschen verwende ich auch gerne.

Klingt gut, auch die Inhaltsstoffe sehen ja recht annehmbar aus. LG Romy
Die Inhaltsstoffe sind noch ganz okay :)

als ich gerade gesehen habe, wie die Maske nach dem Auftragen aussieht, habe ich gleich an die Situation gedacht, wie wohl der Postbote reagiert, wenn man ihm damit die Tür öffnet XD
Haha das wäre mal was lustiges. Schlimmer wäre es wenn es grüne Masken wären :D

Die Maske kenne ich noch nicht. Gerade haben wir aber eine ähnliche Peel-Off Maske getestet und da fand ich das Abziehen so unangenehm.
Aber toll war meine Maske trotzdem!
Das ist bei vielen so aber für jeden Menschen ist es anders was jemand als okay und unangenehm entwickelt :)

Gestern habe ich auch eine Balea Maske gegen Pickel benutzt. Die war total klasse. Nächsten Monat muss ich unbedingt wieder zu DM :-*
Von Rossmann habe ich eine tolle Maske gegen Pickel die verwende ich auch gerne :)


Ich mag die Maske auch total gerne und teile deine Meinung! :)
Das echt eine tolle Maske zum kleinen Preis :)

ich vertrage auf meiner empfindlichen Haut weder Alkohol noch Salizylsäure, daher kommt das Produkt für mich nicht in Frage.
Das echt Schade :(
Hallo meine Liebe,
Die Maske ist toll :) Die Maske bekommt man auch gut wieder ab, das hat mir an dieser Maske echt toll gefallen :)

Der Beitrag is echt super. Ich glaube das kennen viele, man muss ja auch erstmal auftauen. Das is ja cool =)
ich mag die Balea Produkte mit Aktivkohle sehr gerne, so wie die Nasenstrips =)
Peel Off mag ich nicht so, daher is die Maske nicht so für mich. Dann eher Tuchmasken =) Aber klingt gut.
Ich hatte die ja vor einigen Monaten auch und fand die nicht sooo berauschend. Aber da hatte ich noch keine Pickel. Gerade wuchert es richtig durch die SS xD Ich glaube die muss ich vielleicht nun nochmal testen
Ich hatte auch schon einige Fehlkaufe aber kommt auch bestimmt von Haut zu Haut an. :)
Über ein nettes Kommentar freue ich mich. Bla Bla Beleidigungen und Unsinn werden gelöscht.
Willkommen auf meinem Blog

Follow by Email
Blog-Archiv
Beliebte Posts

Der Inhalt dieser Seiten ist mein Eigentum und unterliegt dem deutschen Urheberrecht. Die Kopie, Vervielfältigung, Bearbeitung, Verbreitung und jede Art der Verwertung außerhalb der Grenzen des Urheberrechtes bedürfen vorab meiner schriftlichen Zustimmung.
Kaffeepeeling & Co. selber machen
Kaffee schmeckt nicht nur wunderbar, nein, er pflegt die Haut auch auf optimale Weise. Wie das geht und wie Sie sich Kaffeepeeling, Haarmaske, Augenbalsam und andere Kosmetikprodukte ganz leicht selber machen können, lesen Sie hier

Kaffeepeeling selber machen
Sie können Kosmetik-Produkte kaufen – oder sich ganz leicht selber machen, mit Hilfe von Kaffee. Ganz ohne Zusatzstoffe pflegt er die Haut und sorgt mit seinem Koffeinanteil für eine verbesserte Durchblutung. Der Vorteil: Sie können dafür einfach den Kaffeesatz aus Ihrem Filter verwenden und ihn mit einigen natürlichen Zusätzen aus dem Haushalt nach Wunsch verfeinern.
1. Kaffeepeeling
Das Peeling entfernt alte Hautschuppen und fördert die Zellerneuerung. Das Koffein wirkt anregend und fördert die Durchblutung. Wenn Sie Ihr Kaffeepeeling regelmäßig anwenden, kann sich Ihr Hautbild deutlich verbessern und sogar Cellulite entgegen wirken. Etwa zweimal in der Woche können Sie das Peeling einfach beim Duschen mit einbauen. Tragen Sie es mit kreisenden Bewegungen auf und spülen Sie es anschließend mit lauwarmem Wasser ab. Zusätzlich zur pflegenden Wirkung sorgt das Peeling für ein erfrischendes, belebendes Hautgefühl.
DIY: Die Basis für Ihr Kaffeepeeling bilden etwa fünf Esslöffel Kaffeepulver, die Sie mit kochendem Wasser übergießen und abkühlen lassen. Natürlich können Sie auch einfach die entsprechende Menge Kaffeesatz aus Ihrem Filter verwenden. Eigentlich ist Ihr Kaffeepeeling jetzt schon fertig. Sie können es jedoch noch verfeinern: Je zwei Esslöffel Olivenöl, Jojobaöl oder Honig dazugeben, und schon haben Sie das Peeling zusätzlich zum Koffein mit noch mehr hautpflegenden Substanzen angereichert.
2. Strahlender Teint
Mit Kaffee lässt sich ein zartes Peeling herstellen, das Ihren Teint strahlen lässt.
DIY: Eine halbe Tasse Kaffeesatz mit einer halben Tasse Kakaopulver vermischen. Eine Tasse Vollmilch hinzugeben und rühren, bis eine Paste entstanden ist. Um die Feuchtigkeit zu wahren, noch einen Esslöffel Honig hinzufügen. Auf das saubere Gesicht auftragen und für mindestens 15 Minuten einwirken lassen. Mit warmem Wasser abspülen.
3. Haarvolumen
Laut einer Studie der Universität Lübeck, fördert eine regelmäßige Behandlung der Haare mit Kaffee das Haarwachstum und stärkt die Haarwurzeln.
DIY: Eine Handvoll Kaffeesatz mit einem Klacks Shampoo oder Conditioner mischen und sanft in den Haaransatz einarbeiten, um die Durchblutung der Kopfhaut zu stimulieren. Ein paar Minuten warten und ausspülen.
4. Augenbalsam
Koffein hilft dabei, die Flüssigkeit abzuleiten, die die Schwellungen unter den Augen veranlasst und es engt die Blugefäße ein, die für Augenringe veranwortlich sind.
DIY: Tunken Sie zwei Wattepads in eine abgekühlte Tasse Kaffee. Diese auswringen und über die geschlossenen Augen legen. Dann 10 Minuten warten, bis die Flüssigkeit von Ihrer Haut aufgenommen worden ist.
5. After-Sun
Kaffee besitzt entzündungshemmende Eigenschaften, die Rötungen lindern sowie Antioxidantien, die UV-bedingte freie Radikale bekämpfen. Mehr noch: Forscher haben herausgefunden, dass Koffein, oberflächlich aufgetragen, Hautkrebs auf molekularer Ebene bekämpft.
DIY: Verdünnen Sie eine Tasse gebrühten Kaffee mit kaltem Wasser und weichen Sie ein Tuch oder Ähnliches in der Mischung ein. Dann auf die sonnenverbrannten Stellen legen und Ihre Haut wird sich sofort kühler und besser anfühlen.
Verschiedene Peelings für jedes Budget finden Sie hier.
C-Types im Kaffee Burger


Event in Berlin
Thursday 15 February 2018, 21:00 till Friday 16 February 2018, 01:00
Dusch! Dusch! Bang! . mit einem Tangotrash-Spektakel der anderen Art spielen THE C-TYPES den Teufel an die Wand. "Devil on 45" titelt nicht von ungefähr das im Feb 2011 auf dem Frankfurter Kultlabel Hazelwood Vinyl Plastics (Mardi Gras BB, The Great Bertholinis, King Khan, The Audience, The Mise.
Activities Berlin / Description
New Wave Surfin’
Auf ihrem neuen Album „Robots“ spielen die C-Types 80er-inspirierten DaDa-Punk mit einer Prise Surf-Beat.
Das Trio hantiert dabei mit Kaufhausgitarre, Casio, Theremin, Farfisa-Orgel, Stylophon, Stehschlagzeug und schrägem Gesang. Live spielen sie teilweise maskiert, reissen damit dem Mainstream die Maske herunter und bellen „Sabotage“!
30+ Quilts To Make
Here’s is a large collection of free quilt projects that I’ve organized from my bookmarks and previous Tipnut features…many are simple to make and perfect for beginners. Plenty of inspiration in this list!
Simple: Learn how to machine quilt with this simple project.
Raw Edge Layer Cake: The seams are clipped to give some great ‘cuddle-up’ texture.
Snuggly Bricks: Quick and easy made with fat quarters.
Boxed In: This is definitely one that can be put together in a weekend, or even less, if you are ambitious!
Pieced Scrap Border: The pieced block is no more than a square center that has been given a pieced border.
Crazy Nine Patch Lattice: Crazy nine-patch blocks, with another tutorial for making a nine-patch lattice.
T-Shirt: You’ll need around 20 t-shirts to make this quilt.
Modern Square Garden: This shows you how to make the top, finished sized is 38 1/2″ x 51 1/2″.
Vintage Sheet: A simple project perfect for beginners using blocks of vintage sheets (you can use any fabric you like).
Cathedral Window Tutorial: Measurements and instructions for making a cathedral window block…includes lots of resources.
1-2-3 Easy: This utilizes the “pillow-case” method of binding, so there are no bias strips to make.
Blue Jeans: This is the project you’ve been saving your old jeans for.
5×5: For babies but you can make it larger for an adult sized if you like, no problem!
His & Hers: Finished size is 99″ x 100″ and a fun variation of a coin quilt.
Self Binding: Teaches how to use a larger piece of fabric for the back and use the extra fabric to bind.
Raw Edge Jelly Roll: All the cutting is done for you with this easy-peasy project using 64 jelly roll strips and batting.
Sucky Puff (yo-yo): Finished size measure 42-1/2″ x 54″ or 28 rows of 21 yo-yos. Includes template for making the yo-yos (each is filled with a small pom pom) and then instructions for assembling.
Mc-Cheats-A-Lot: Assorted squares of fabric are sewn on top of a duvet, edges are unfinished (or do a zig-zag stitch around edges if you prefer).
Whale’s Tale: Queen size (85 1/2″ x 93″) and made with 36 tail blocks (5″ x 20″). Template included in pdf tutorial.
Here’s a vintage string quilt tutorial (First published on Tipnut September 2, 2009 and moved to this page for better organization)
*Click Picture For Larger File
- Use 10 inch squares (or smaller) from better parts of worn blankets or men’s flannel shirt tails, for block foundation Step 1. This also makes the lining. A grand opportunity to use up all those long slender scraps left in the scrap-bag.
- Pre-Shrink Materials That Are New by wetting and pressing.
- Sew strips to the foundation piece as shown Step (1) and (2) Making Block (1) with two sides loose.
- Step (3) Lay block (1) on top of block (2).
- Pin lining on block (1) back out of seams way and sew edge of two blocks together. Flatten seam and whip the lining on block (1) down flat over the seam. Either put together in strips or make a square and keep adding blocks. Finish edge with a binding.
- The whole trick is to keep the sewn edge of one block inside the loose edge of the other block when putting the blocks together. When set together the lining is finished too.
Source: Women’s Household Magazine (1960s)
Print
Published: November 26, 2010
Updated: September 12, 2012
More Goodies To Check Out:
What Readers Are Saying:
I can’t believe there are so many gorgeous free quilt patterns on the Internet! Thanks for the list Tipnut!
I am so happy to see quilt patterns on your site. Keep them coming.
Thank you for the quilt patterns and tutorials. I will visit many times.
Great post here, cant believe it…
Thank you so much for featuring my chevron rag quilt on your very cool site!
I have never made a quilt and I’d like to start but I don’t have any one around me that can show me how to do it. does any one have a suggestion on the most simple pattern to make. it has to be really simple. I have trouble concentrating some times, so if it’s to difficult I’ll give up
Welcome To Tipnut.com
1000s of Ideas & Projects
. all for you to enjoy.
Find the latest creative ideas from Tipnut herself plus freebies compiled from around the net.
Tip: Search online with the word "tipnut" to find the good stuff fast!

Комментариев нет:
Отправить комментарий